Last Updated on November 8, 2018 by Admin
12.3.1.5 Lab – Configure the Firewall in Windows 7 and Vista Answers
Lab – Configure the Firewall in Windows 7 and Vista (Answers Version)
Introduction
In this lab, you will explore the Windows Firewall and configure some advanced settings.
Recommended Equipment
- Two computers directly connected or connected on a network
- Windows installed on both computers.
- Computers are in the same workgroup and share the same subnet mask
Part 1: Configure the Firewall in Windows 7
Step 1: Create and share a folder.
- On computer 1, right-click on the desktop and select New > Folder. Name the folder Cisco.

12.3.1.5 Lab – Configure the Firewall in Windows 7 and Vista Answers 01
- Right-click the Cisco folder, and then select Share with > Advanced Sharing. The Advanced Sharing window opens. Share the folder. Use the default name Cisco.

12.3.1.5 Lab – Configure the Firewall in Windows 7 and Vista Answers 02
- On computer 2, click Control Panel > Network and Sharing Center. Click the icon with the network name to which your are connected.

12.3.1.5 Lab – Configure the Firewall in Windows 7 and Vista Answers 03
- Double-click computer 1.Can you see the shared folder Cisco?_____________________________________
Yes
Note: If you answered no, ask the Answers for help. - Close Network.
Note: Use computer 1 for the rest of the lab unless otherwise stated.
Step 2: Open Windows Firewall.
- To open the Windows Firewall, use the following path:
Control Panel > System and Security > Windows Firewall - The normal state for the Windows Firewall is On.

12.3.1.5 Lab – Configure the Firewall in Windows 7 and Vista Answers 04
- What are the benefits of Windows Firewall?__________________________________________________________________________________
__________________________________________________________________________________
__________________________________________________________________________________
Windows Firewall can help prevent hackers or malicious software from gaining access to your computer through the Internet or a network.
Step 3: Investigate the Windows Firewall Allowed Programs feature.
- Click Allow a program or feature through Windows Firewall.

12.3.1.5 Lab – Configure the Firewall in Windows 7 and Vista Answers 05
- The Allowed Programs window opens. Programs and services that Windows Firewall is not blocking will be listed with a check mark. You can add applications to this list. This may be necessary if your customer has an application that requires outside communications but for some reason the Windows Firewall cannot perform the configuration automatically. You must be logged on to this computer as an administrator to complete this procedure.

12.3.1.5 Lab – Configure the Firewall in Windows 7 and Vista Answers 06
- Click What are the risks of allowing a program to communicate? The Windows Help and Support window opens. Creating too many exceptions in your Programs and Services file can have negative consequences.
Describe a negative consequence of having too many exceptions.
__________________________________________________________________________________
__________________________________________________________________________________
__________________________________________________________________________________
Answers will vary. Exceptions for a program to communicate through the Windows Firewall are like opening a hole in the firewall. Attackers use software that scans the Internet looking for computers with many exceptions and open ports.
12.3.1.5 Lab – Configure the Firewall in Windows 7 and Vista Answers 07
- Close the Windows Help and Support window.
Step 4: Configure the Windows Firewall Allowed Programs feature.
- On computer 1, click the Allowed Programs window so it is active. Click Change settings, if necessary. To turn off an exception, remove the check mark from File and Printer Sharing, and then click OK.

12.3.1.5 Lab – Configure the Firewall in Windows 7 and Vista Answers 08
- On computer 2, attempt to open a connection to computer 1, using the following path:
Control Panel > Network and Sharing Center > Network icon.
Can you connect to computer 1?___________________________________________________________________________________
No
12.3.1.5 Lab – Configure the Firewall in Windows 7 and Vista Answers 09
- On computer 1, add a check mark to File and Printer Sharing. Click OK.
- On computer 2, refresh the Network screen and attempt to connect to computer 1. Can you connect to computer 1? __________ Yes

12.3.1.5 Lab – Configure the Firewall in Windows 7 and Vista Answers 10
- Log off computer 2. Use computer 1 for the rest of the lab.
Step 5: Configure Advanced Security features in Windows Firewall.
- To configure advanced security, use the following path:
Control Panel > Administrative Tools > Windows Firewall with Advanced Security - In the panel on the left, you can select items to configure Inbound Rules, Outbound Rules, or Connection Security Rules. You can also click Monitoring to view the status of configured rules. Click Inbound Rules.

12.3.1.5 Lab – Configure the Firewall in Windows 7 and Vista Answers 11
- In the middle panel, scroll down until you find the inbound rule named Files and Printer Sharing (Echo Request – ICMPv4-In). Right-click on the rule and select Properties > Advanced tab > Customize.

- The Advanced tab displays the profile(s) used by the computer and the Customize Interface Types window displays the different connections configured for your computer. Click OK.

- Click the Programs and Services tab. Click Settings…. The Customize Service Settings window opens. In the space below, list the short name of four services that are available. When done, click Cancel.
___________________________________________________________________________________
Answer will vary. AeLookupSvc, Appinfo, ALG, AppMgmt, etc.
- There are many applications that users do not normally see that also need to get through the Windows Firewall to access your computer. These are the network level programs that direct traffic on the network and the Internet. Click Protocols and Ports tab.

- For the ICMP settings, click the Customize button. The Customize ICMP Settings window opens. In the example here, allowing incoming echo requests is what allows network users to ping your computer to determine if it is present on the network. In the space below, list four of the Specific ICMP types.
____________________________________________________________________________________
____________________________________________________________________________________
Answers will vary. Packet Too Big, Destination Unreachable, Source Quench, Redirect, etc.
- Close all windows.
Part 2: Configure the Firewall in Windows Vista
Step 1: Create and share a folder.
- On computer 1, right-click on the desktop, select New > Folder. Name the folder Cisco.

- Right-click the Cisco folder, and then select Share > Continue. The Advanced Sharing window opens. Share the folder. Use the default name Cisco.

- On computer 2 click Control Panel > Network and Sharing Center > Network icon (icon with the network name to which you are connected).

- Double-click computer 1.Can you see the shared folder Cisco? _______ Yes
Note: If you answered no, ask the Answers for help. - Close Network.
Note: Use computer 1 for the rest of the lab unless otherwise stated.
Step 2: Open Windows Firewall.
- To open the Windows Firewall, use the following path:
Control Panel > Security Center - The normal state for the Windows Firewall is On. Click Windows Firewall in the left panel.

- The Windows Firewall window opens. Click Change settings > Continue.

- The Windows Firewall Settings window opens.
Why is turning off the Windows Firewall not advised?_________________________________________________________________________________
_________________________________________________________________________________
_________________________________________________________________________________
Turning off Windows Firewall may make the computer more vulnerable to viruses, worms and malware.
Step 3: Investigate the Windows Firewall Exceptions tab.
- In the Windows Firewall Settings window, select the Exceptions tab. Programs and services that Windows Firewall is not blocking will be listed with a checkmark. You can add applications to this list. This may be necessary if your customer has an application that requires outside communications but for some reason the Windows Firewall cannot perform the configuration automatically. You must be logged on to this computer as an administrator to complete this procedure. Click What are the risks of unblocking a program?

- The Window Help and Support window opens. Creating too many exceptions in your Programs and Services file can have negative consequences.
Describe a negative consequence to having too many exceptions.
_________________________________________________________________________________
_________________________________________________________________________________
_________________________________________________________________________________
Answers will vary. Exceptions for a program to communicate through the Windows Firewall are like opening a hole in the firewall. Attackers use software that scans the Internet looking for computers with many exceptions and open ports.
- Close the Windows Help and Support window.
Step 4: Configure exceptions to the Windows Firewall.
- On computer 1, click the Windows Firewall Settings window so it is active. Click Change settings, if necessary. To turn off an exception, remove the check mark from File and Printer Sharing. Click OK.

- From computer 2, attempt to open the network connect to computer 1, using the following path:
Control Panel > Network and Sharing Center > Network icon.
Can you connect to computer 1? ________ No
- On computer 1, add back the execption for File and Printer Sharing. Click OK.
- On computer 2, refresh Network screen and attempt connect to computer 1. Can yout connect to computer 1?___________________________________________________________________________________
Yes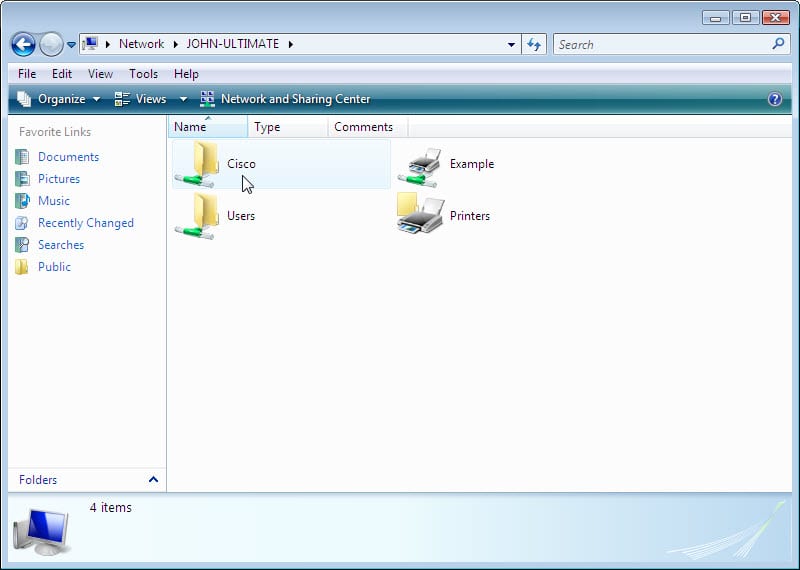
- Log off computer 2. Use computer 1 for the rest of the lab.
Step 5: Configure Advanced Security features in Windows Firewall
- To configure advanced security, use the following path:
Control Panel > Administrative Tools > Windows Firewall with Advanced Security - In the panel on the left, you can select items to configure Inbound Rules, Outbound Rules, or Connection Security Rules. You can also click Monitoring to view the status of configured rules. Click Inbound Rules.

- In the middle panel, scroll down until you find the inbound rule named Files and Printer Sharing (Echo Request – ICMPv4-In). Right-click on the rule and select Properties > Advanced tab > Customize.

- The Advanced tab displays the profile(s) used by the computer and the Customize Interface Types window displays the different connections configured for your computer. Click OK.

- Click the Programs and Services tab. Click Settings…. The Customize Service Settings window opens. In the space below, list the short name of four services that are available. When done, click Cancel.
___________________________________________________________________________________
Answer will vary. AeLookupSvc, Appinfo, ALG, AppMgmt, etc.
- There are many applications that users do not normally see that also need to get through the Windows Firewall to access your computer. These are the network level programs that direct traffic on the network and the Internet. Click Protocols and Ports tab.

- For the ICMP settings, click the Customize button. The Customize ICMP Settings window opens. In the example here, allowing incoming echo requests is what allows network users to ping your computer to determine if it is present on the network.
List four of the Specific ICMP types.
____________________________________________________________________________________
____________________________________________________________________________________
Answers will vary. Packet Too Big, Destination Unreachable, Source Quench, Redirect, etc.
- Close all windows.